If you like, you can skip directly to where you can buy this part.
These instructions, for removal and re-installation of a BMW E30 glove compartment, are from my personal experience, doing this on several cars, including my personal-transportation 1987 BMW 325.
 The little receptacle into which the flashlight fits has, no surprise, two-wires attached to it, but I couldn’t see any sort of plug by which they can be detached, so the next best idea is probably to use a thin flat-headed screwdriver to slip the catches that anchor the plug to the side of the glove compartment. I then moved the plug downwards, in the direction of the wiring. The plug has, on one side, a raised profile that mates with a groove in the glove compartment, to make it easy to install the right way around.
 The wire from the plug goes along a little channel in the side of the glove compartment. Two small steel clips keep it in position. I yanked hard at the wire to get the clips loose; they then fly into space which is why it’s good to wear safety glasses. These clips tend to be rusted.
 I removed the glove compartment by first undoing the two weight-bearing straps’ black plastic fasteners. I do so by pressing from the outside inwards until the head has moved out enough for me to get a flat-tipped screwdriver inserted so I can pry the fastener more loose yet. You shouldn’t have to remove the straps.
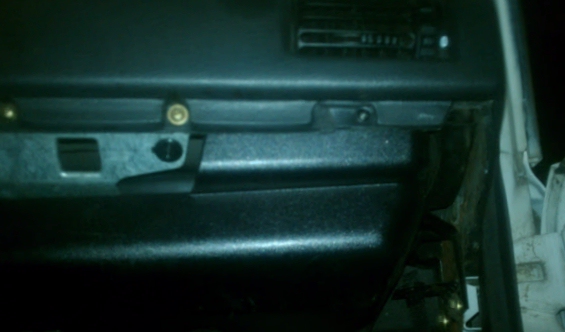
If you’re not particularly smart, you would next reach underneath to the rear of the glove compartment and undo three brass-colored bolts there. They are 8mm bolts, as I recall. In retrospect, this was a bad idea. I found this out the hard way.
What I should have done is to loosen (not remove) the three 10 mm nuts that are attached to three bolts that point down vertically from a sort-of-shelf-like structure by the firewall.
That would have enabled me to slide the glove compartment AND the brass-colored plate that’s attached to it, with the previously mentioned 8 mm bolts, forward and out.
Here is a picture of the brass plate:
 Notice how the back plate is slotted for horizontal adjustment so that the latch fits nicely. The bottom slots are for the 10 mm bolts and nuts. These attach the plate to a horizontal shelf in the firewall area of the car. The top holes are for the 8 mm bolts that attach the plate to the rear of the glove compartment.
The top bolts go into some square steel plates that go into the back of the glove compartment. Here is a picture:

Taken from the top, here is a picture of the rear of the glove compartment, showing the little pockets where the nut-function-square-plates fit into:

Notice how the back is slotted for vertical adjustment so that the latch fits nicely.
The problem with removing the 8 mm bolts is that they are very hard to re-install when the brass plate is still attached to the car. By then, you’re trying to attach them to the rear of the glove compartment. Gravity works against you, and the little square plates tip over when given the opportunity. They are also hard to keep in position so that the incoming bolt can start threading. And, lastly, it tends to be dark “down there.”
The better plan, I found out belatedly, is to loosen the 10 mm bolts at the back and then slide the entire glove compartment out. Re-installation is then also comparatively easy.
As to this hinged plate: the hinges swing in both directions, but the one side of the hinge area is flat, and the other is raised. The correct way to install the hinge is with the raised side away from the glove compartment.
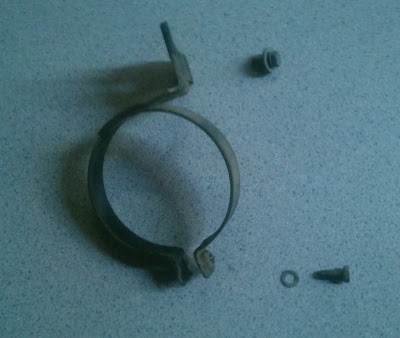
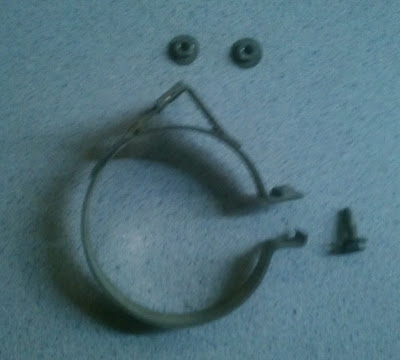
 The glove compartment lock and latch are removed (from the inside, naturally, to make things harder for thieves) by first removing two Philips screws.
I removed the glove compartment on my own car to unlatch the wiring from the fuel injection computer. The irony of the matter is that I didn’t need to. Just opening the glove compartment and unhooking the straps, at the bottom, would have given me enough access.
If you can avoid removing the glove compartment, do. Re-installing it can be a pain. I messed with mine for three hours, trying to get it aligned in the x, y and z planes so that it latches, doesn’t rub against anything, and doesn’t foul the fuel injection wiring harness. And, I failed, mostly because I’d removed the brass hinge plate and it was a huge struggle due to that.
To help with the alignment, the best approach I have found is to slide the brass plate (when already attached to the glove compartment) into position beneath the heads of the three 10 mm nuts, and then tighten them slightly. Next, close and latch the glove compartment. Then, tighten the three nuts all the way.
 This plate also helps hold up the fuel injection wiring harness in case it felt like sagging. It also has a little lamp that lights up when someone opens the glove compartment.
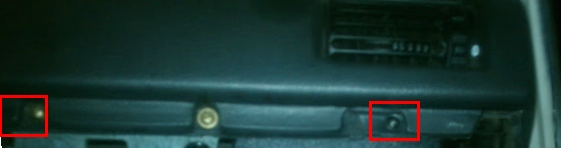
 When re-installing the plate, make sure that you thread the glove compartment flashlight recharging plug wire way down, so that the wire has lots of movement.
 The plate also holds up the inboard portion of the base of the fuel injection computer, and it attaches to this using two more such 10 mm bolts that go vertically upwards.


You must be logged in to post a comment.