Whoa, I thought I had a rev limiter

I recently replaced both the clutch and the timing belt on my 325.  If ever there was occasion for a high-revving celebration, this was it.

The 2.7 liter eta version of the M20 is a long-stroke design, with 4 main bearings instead of 7 so as to keep friction low.  This means it doesn’t like revving as high as its non-eta 2.5 liter shorter-stroke, 6-bearing counterpart.

So, for me, high-revving the eta engine means staying on the conservative side of the 4800 redline.  And, normally the rev limiter helps me as such.  Imagine my surprise when I glanced down at the tach and saw the needle descending *towards* the 5000 rpm mark.  I’d revved the engine about where the tach markings even *go*.  Not good.

Seems to me that I have an unhappy ECU.  Darn it. Until I replace it, I need to be very careful as to how high I rev.

Common Parts: E30 vs. a 1987 535i

I’m analyzing a 1987 535i to see what parts it has in common with an E30.  So far, it’s slim pickin’s.  The ventilation control buttons, the glovebox hanger, the door handle surround … hardly reason for celebration.

The sub-frame structure of the 535i is quite different too.  Dropping it below the body isn’t as fun as in the case of the E30.  At least, they have one thing in common: the steering is a pain to disentangle.

The windshield on the 535i was already cracked, so I tried to save the windshield rubber. No such luck; someone had glued it to the body, and it tore when I pulled it loose.

The front doors on the 535i are an interesting complexity.  The wires to the doors are terminated in plugs that are hidden below the kick panels.  Remove the speakers in the kick panels and then pull the panels loose, and yank the wires upwards.  The plugs should become visible.  Most of these need to be squeezed so as to be loosened. Then, feed the wire through the hole in the door jamb.

The door stay has a pin with a clip holding it in place, at the bottom.  Slip the clip free with a flat-bladed screwdriver, then hammer the pin upwards to free it.

The door is bolted to hinges.  Hitting the hinge pins free is tedious and the door shape gets in the way.  The better way is to unbolt the door from the hinges, but first remove the door trim.  To do this, use a large Philips screwdriver to remove the door handle screws.  Try to hold it fairly horizontal or it will slip.  Then, turn the door handle through 90 degrees and remove it.  The door panel then snaps loose if you pry it off with a flat-bladed screwdriver. This exposes the bottom hinge bolts.  These and the top bolts come loose with a 13 mm socket.  I removed all but the top bolt and then I was ready to support the weight of the door as I removed the last bolt.  It’s been a while since I removed an E30 door but I suspect the process can hardly be more complex. I do recall that the E30 door wires also have plugs.

The HVAC controls on the 535i involve many cables and wires; careful unplugging is the key.  The radio is in the way too; pull the antenna wire out carefully and the rest of the wiring mostly involves plugs.

Removing the central console on the 535i involves a blend of Philips screws and small-sized bolts (10 mm or less).  On the E30, probably a similar process.

In South Africa, BMW dropped the M30 engine (as in the 535i) into an E30. It was a tight fit, so much so that there wasn’t room for both an air conditioning compressor and power steering, so customers had to choose one or the other.  The result, however, was a very fast car.

The Darn Headlights Do Not Turn Off

I just arrived home after driving my 1987 BMW 325, at night.  I turned off the ignition and the lights … and the main headlights remained on.  Turning the light switch on and off again made no difference.

Cause: a stuck relay.

I opened the hood, held it open with one hand so it doesn’t fall on my head, and took the clear plastic cover off the fuse and relay box. It’s up high inside the engine compartment, relatively close to the steering wheel area.

I rapped each relay in turn gently with my fingers or knuckles, and when I rapped the light switch relay, the lights turned off as they should have done in the first place.  It’s the relay that’s closest to the firewall, in the row that is closest to the engine.

I need to replace that relay, but this trick means that I won’t have a flat battery by tomorrow morning.

Bleeding the Clutch Slave Cylinder

Typically, the clutch as used for manual transmission cars is activated by cable or hydraulics.  On the 1987 BMW 325 and probably many other E30 models, the clutch uses hydraulics.

It uses the same fluid (and fluid reservoir) that the brake system does.

The slave cylinder for the clutch is on the driver’s side, inside the bottom of the transmission tunnel.  To detach or attach to the metal hose that goes to the rest of the car, undo the 11 mm nut and the 14 mm nut. Whenever you remove or replace the manual transmission, that’s part of the job.

Breaking that connection lets air into the hose, and before the clutch can work again, it needs to be bled.  To do this, remove the dust cover from the bleed nipple.  It faces diagonally downward and is loosened with a 7 mm wrench.   I recommend using a commercially available “bleeding bottle and pipe” set.  It’s tricky work and is best done by two people: one below the car, tightening and loosening the nipple and the other moving the clutch pedal up and down on command.


Attaching the Front Brake Hoses

On the 1987 BMW 325, the front brake hoses that go to the wheels are rubber so that they can flex as the wheels move and swivel.  The hoses attach to metal tubing that runs, presumably, to the ABS unit.

For each front wheel, the attachment point is a platform attached to the body, under the front wheel-well.  The metal tubing comes in from the bottom and the rubber comes in from the top (as I recall; it might be the other way around).

A spring-loaded clip shaped like an upside down “U” is to be placed onto the platform.  Both the clip and the platform have a hole through them, so that the tube and hose can be shoved through so as to connect at the clip.

On the metal side, the connector is an 11 mm nut; on the hose side, a 14 mm nut.  It was awkward for me to get all four pieces (the platform, the clip, the hose and the tube) into position so that I could start the thread, but I managed.

I am not sure but I am guessing that the rear brakes and the other E30 models and years work in a similar way.

Removing the Drive Shaft

On a 1987 BMW 325, the drive shaft situation looks very similar to me than that of the 1985 model, for manual transmission anyway.

The front of the drive shaft connects with three long bolts and nuts to a rubber disk that’s at the tail housing of the transmission.

The rear of the drive shaft connects with four bolts and 17 mm nuts to a flange that’s at the front of the differential.

To remove the bolts, it’s helpful (arguably, necessary) to rotate the drive shaft, so that each nut can be accessed. To have one or both of the wheels up in the air, and the handbrake loose, is a precondition.

But, to loosen or tighten the nut, it helps to have the shaft NOT move.  It can be a time-saver to have an assistant who engages and disengages the handbrake accordingly.


M20 Timing Belt Tensioner Pin and Spring

On the M20 engine as used in the E30 325, the pressure on the timing chain tensioner is the result of a spring that pushes against the water pump.  To prevent the spring from flying off into space, it is wound around a steel pin that is held in position.

At the water-pump side of the pin, there is a detent (three-sided metal wall) that boxes in the blunt end of the pin.

At the tensioner side of the pin, there is a hole into which the sharp end of the pin fits.

The tension on the spring is significant. To get the pin into position, I had to push very hard, with much of my upper-body strength.

Let’s think about this pin.  It’s made of steel.  It’s about 2 inches long.  It has a sharp end.  It’s kept in position by a spring with A LOT of energy. If this sounds like a dangerous combination to you, than we’re in agreement.  I made a point of wearing safety glasses while working on this task.  Even so, I was very wary.

To get the pin into position can be very tricky when you’re installing the water pump, if the timing belt is already in position, exerting counter-pressure.  We ended up loosening both bolts that keep the tensioner in position.  That enabled us to get the spring and pin into position, and we could then pry the tensioner back into position well enough to get both bolts back into place.

Fuel Hose Rupture Escapade

While driving my 1987 BMW 325, I noticed a smell of gasoline.  I figured it was a leak, but I had no tools with me, so I planned to keep going and fix it when I got to my destination.

When I could see the fuel gauge descend, I became very worried.  The car had been parked for two years, and rubber tends to not age gracefully.  I pulled into a gas station, peeked underneath and saw fuel dripping onto the concrete — not good.  I opened the hood and saw fuel spraying from the high-pressure hose that connects the “T” to the fuel rail.

I limped the car to a nearby O’Reilly auto parts store, where a friendly salesperson lent me a screwdriver which I used to remove the bad fuel line, and for good measure also the similar one that led from the “T” to the cold start injector.  I showed them both to the salesperson, who sold me two replacement hoses, cut to the right length. The relevant size is 7.9 mm, which I assume refers to the inside diameter.

I also bought a thin-bladed screwdriver able to undo the small screws in small hose clamps, and a set of four replacement small hose clamps — all for less than $20.  I replaced the fuel hoses, noticing that the ones I’d just bought were marked for use in fuel-injected cars, and the ones I’d just replaced were marked as NOT for use in fuel-injected cars.  I don’t know who had installed them, but I don’t have many kind thoughts about their professionalism.

With the leak fixed, I was on my way again, but it occurred to me that a nice addition to my emergency roadside kit would be the sort of sharp knife that can slice through this sort of fuel hose.

It also seems like a good idea to have the correct lengths of hose as needed for the various parts that can rupture at some point.   I count four in the engine compartment:

  • From the metal inbound fuel line near the bottom of the driver’s side firewall area to the “T” atop the valve cover
  • From the “T” atop the valve cover to the cold start injector
  • From the “T” atop the valve cover to the fuel rail
  • From the fuel pressure regulator to the metal outbound fuel line near the bottom of the driver’s side firewall area

Probably, the fuel pump and fuel filter area have some more hoses.

I’d make a point of keeping the thin-bladed flat-blade screwdriver in the car, to undo the small hose clamps that go around the fuel hoses.

It seems like a good idea to have a couple of spare small hose clamps handy, in case one or two are destroyed in the process of being removed.

This was a time when I regretted not having a fuel extinguisher handy; the fuel was spraying very close to the exhaust manifold and I consider myself lucky that the car didn’t catch fire.  I trunk-mounted unit would be a good idea.

My hands were soaked with gasoline by the time the work was done, and a pair of vinyl gloves would have prevented much or all of that.

Had the longer fuel lines ruptured, I’d have been lying on the ground, peering up at the place where the rubber fuel lines attach to the metal fuel lines.  So, a large towel to lie on would have been nice.  Also, safety glasses and a flashlight could have been helpful.  I’ve seen someone experience gasoline being sprayed into their eyes, and it’s not something I plan to experience myself.

Sometimes rubber can be very stubborn to remove, and hot water poured over it can change all that.  Today, while struggling to free the ruptured hose, I seriously considered going to a nearby pub and ordering a hot tea to go, without any sugar, milk or tea in it.  The hot water would have made the rubber much more cooperative.

If I’d had a sharp knife handy, I could have had cut open the old hose at the point where it it’s stuck, thus making it easier to yank off.

Some spare hose clamps and additional fuel hose would be a good addition to my workshop inventory.

As a preventative maintenance item, it seems wise to replace these fuel lines every few years.

Successful E30 Clutch and Timing Belt Project!!

Ever since I saw cars being built in an automobile assembly plant where I worked as a cost analyst, I was puzzled why people don’t focus more on how the factory did things, because that was probably the more efficient way, by far.

I have personally struggled with many tasks that could be done far more easily when another part were first removed, or when the paradigm changed.  “How did they do this at the factory?” became a good guiding principle for me whenever I worked on a car.

When my 1987 325 needed both its clutch and its timing belt replaced, I chose the approach where the entire sub-frame would be removed from the car, complete with engine, transmission and suspension.

Previous to that, my team had struggled with removing the transmissions off two other 325 cars, and it was a miserable task.

On the third car, it was super-easy. Removing the transmission from the engine was SO much easier and nicer with everything in the open.

It was also easier and nicer to work on the clutch and the timing belt, with everything in the open, completely out of the car. The car was many feet away, hanging from a mobile gantry that I’d bought for this purpose.

Many hoses, pipes, cables and wires needed to be undone, but that was (for me) preferable to the alternative.

I loved seeing how easily everything came apart, and how easily accessible everything was once the sub-frame had been removed from the car.  I didn’t even care if the car ever ran again. I’d proved a hypothesis that I’d been wanting to prove ever since I was 22 years old.

My tenacious technician, who prefers to remain anonymous, wanted me to have the benefit of a functioning car too, and he doggedly pursued getting the clutch, timing belt and water pump replaced, then putting it all together again and hooking everything up.  The victory is mostly his, since he did more than 95% of the work, and more than 99% of the most difficult tasks. Yet, I love seeing the basic concept having been proved.

Today, everything was finalized and I actually drove the car on the road again.  The gratitude, joy, satisfaction, pride and vindication were intense and wonderful.

It’s an open question as to whether, when it’s all said and done, this was easier than the traditional way.  I plan to keep refining this approach until it is certainly easier, because I think it fundamentally has more merit.

Things I would improve include:

  • Not removing parts unnecessarily, such as the glove box
  • Putting pans underneath the car so when fasteners or parts fall down, they don’t roll or bounce far away
  • Having a spare set of all the fasteners needed
  • Having spare parts in case things break
  • Having another car to go look at to see how things come together
  • Having cans or bins nearby so that as I remove fasteners, I can put them in a known place.  There’s a lot to be said for putting fasteners right back, but that isn’t always viable.
  • Having the right tools
  • Knowing which tool I’ll need for which task
  • Knowing what goes where, such as how to connect the fuel lines the right way around.

I’m about to get into my 325 and drive it to Reno, 60+ miles away.

Before today, the last time I drove the car was almost two years ago.

I’m happy. 🙂

Snapping Off the Bottom Corner of the Timing Belt Cover

While replacing the timing belt on a 1987 325, we found it easy to break off the bottom portion of the timing belt cover plate.  Normally, the timing belt cover is a two-piece unit but we made a three-piece unit out of it.  We tried some JB Weld or the equivalent, but the next time we took the part out, it broke again at the same spot.

The initial bolts that are loosened tend to be at the top, and the last few bolts to be loosened are obscure and it’s tempting to wiggle the plate to see if it will come loose.  And, “snap …”

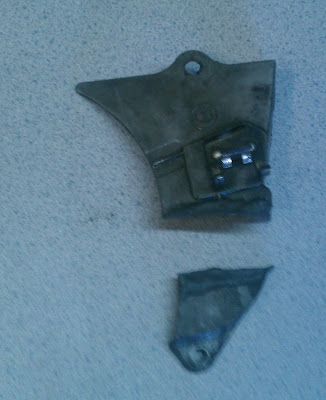
We cannibalized a 1985 325e that we have in the yard, and removed its lower plate.  Normally this means removing many parts, but we freed the part by sawing off the stud that separates the upper plate from the lower plate.

The part off the 1985 engine fits on the 1987 engine but it’s slightly different.  Here is a picture:

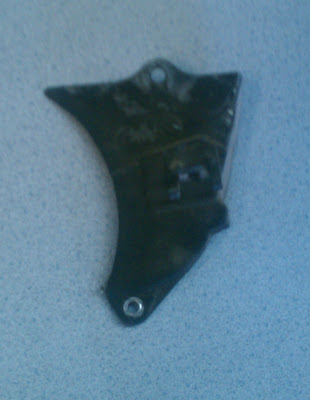
The latter has been reinforced more, structurally, though not at the point where we managed to snap the plate in half.

I’d sell the upper plate for $20, and the lower plate for $30.